Experimental creature
Just one eye’dea
This started as just a simple creature to test out some material node setups that used vector painting to control aspects of it, but as I worked on it, it began to grow on me and is now one of my favourite creations so far possibly because it emerged as I was working on it.
The initial shape was created with a tapered curve which was then converted to a mesh from which I extruded the back spine/tentacles. Once the basic shape was created I then switched over to sculpt mode to create the eye socket, tummy ridges and fleshy bits around the tail light.
The lighting for the creature was based on aspects of 3 lighting setups from ‘Blender Guru : Pro-Lighting Studio’ addon, in addition to this the creature was then encased in a block with a volume shader added to it.


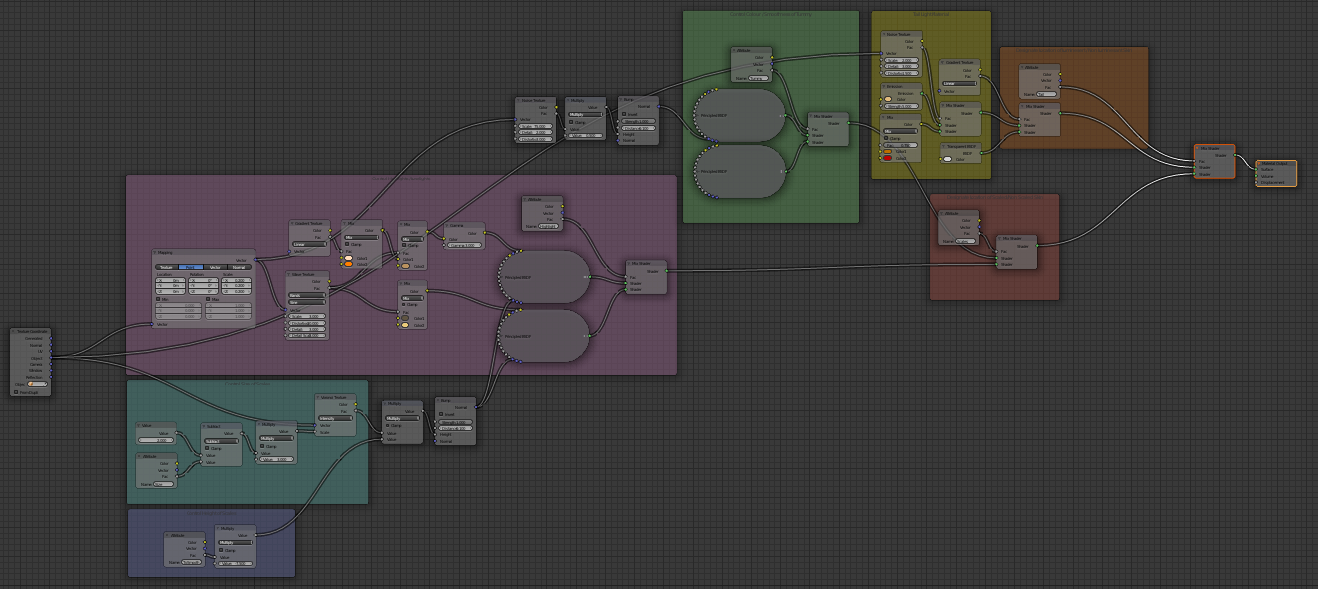


The main bumpy / scaly skin that covers the bulk of the body has aspects of it controlled by 3 vector paint maps.
The skin has a lighter and darker version of it, the mix between these two versions is controlled by the ‘Highlight’ map, here darker areas of the map correspond to the darker version of the skin, this map was created by selecting the body, going into vertex paint mode and selecting the ‘dirty vertex colour’ option from the paint menu.
The ‘Size’ map controls the size (as in diameter) of the scales, where black (0) will have no scales and white (1) will be the largest size. To Reverse this and have white as no scales and with black as scaled, in the node setup just change (Size - 2.000) to (Size + 1.000).
The ‘ToSmooth’ map controls the height of the scales, where black is smooth and white is bumpy
The ‘Tummy’ map like the above maps controls aspects of a skin material, in this case the blend between a lighter and slightly textured material and a darker smooth material for the creatures tummy and sections of its tentacles
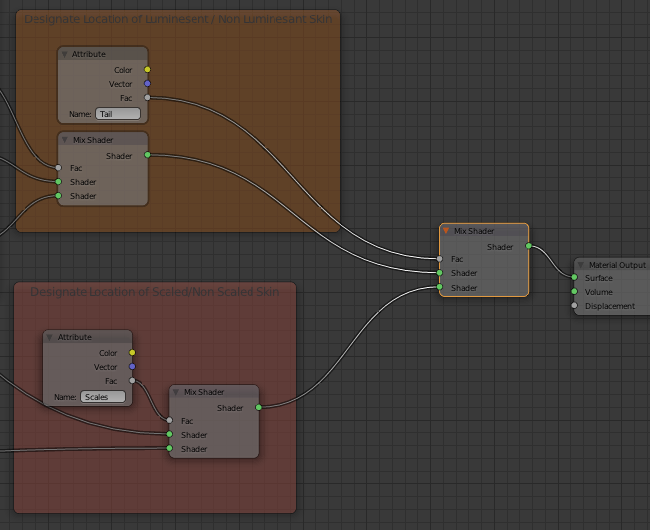
The ‘Tail’ and ‘Scales’ maps however control where the different materials show on the creature, in the case of ‘Scales’ white controls where the scale material will appear and black where the tummy material appears (with some fading between the two materials). Finally the ‘Tail’ map controls where the glowing tail material will appear, with white being the other materials and black being the glow material.

Initially the glowing material was going to be a separate mesh, but the separation between its material and that of the creature was too obvious and jarring, so I chose to control this by a vector paint map as well.
A workflow tip for working with multiple vector paint maps is to save the initial blank ‘col’ map (This is the one I called ‘Base’). The reason for this is that when you click the + to create a new map it will duplicate the map you have selected, so after getting a map to where you want it, click/highlight the base map so when you duplicate/create new, you have a blank canvas to start with again.


